

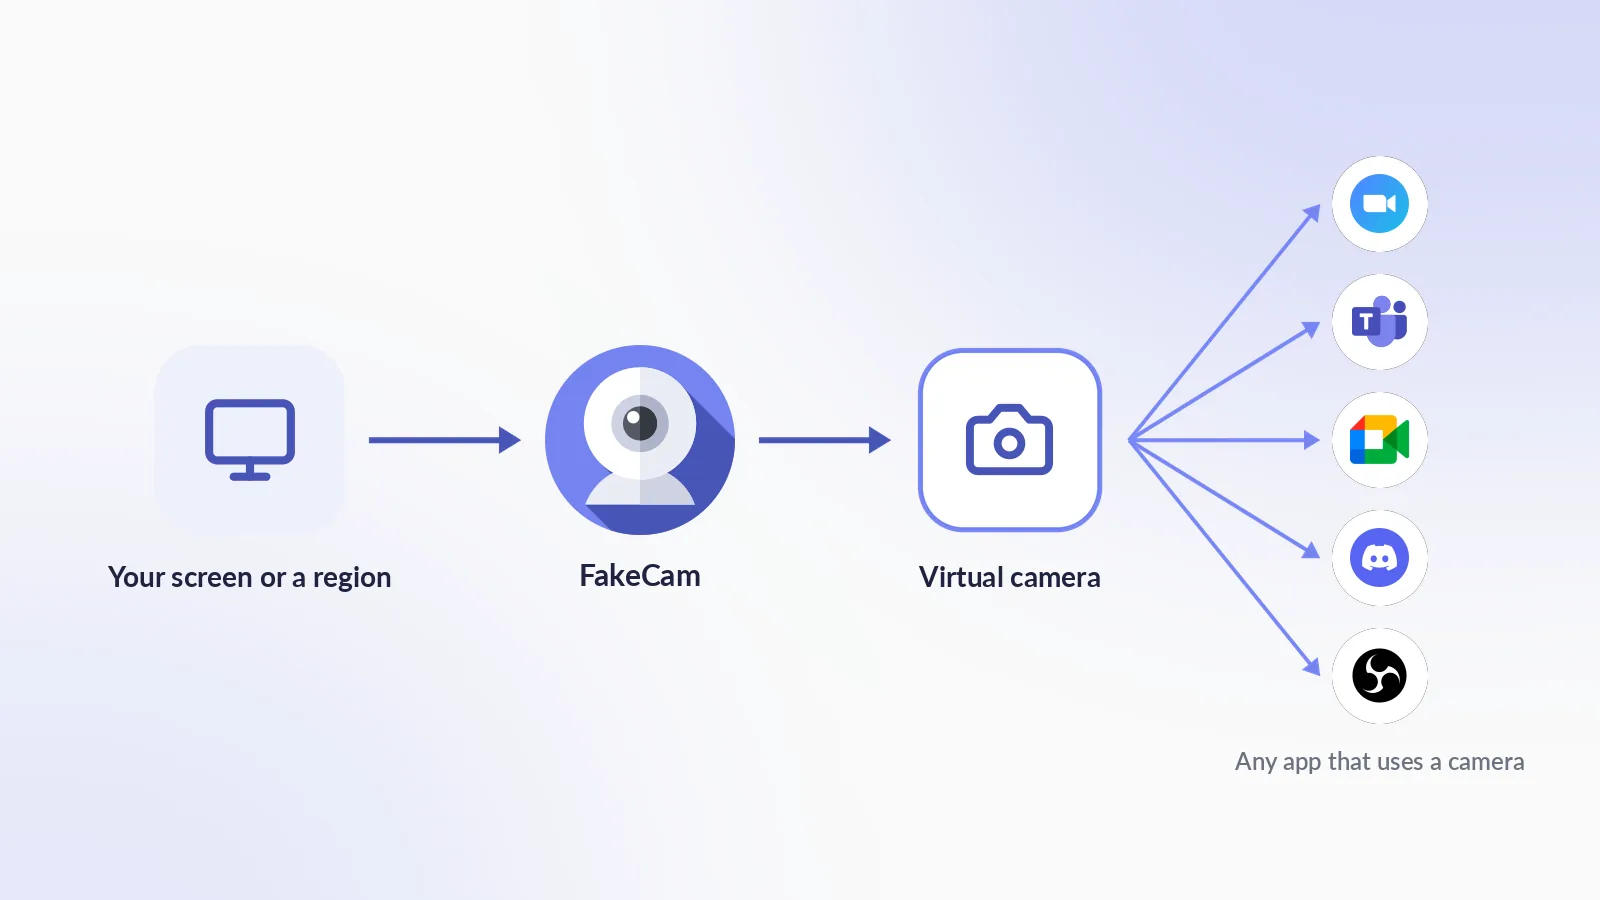
To use your screen as your webcam, run a virtual camera that captures the screen instead of a lens. On Windows, FakeCam does this free: open its Screen tab, choose the whole screen or draw a region, press Start, and pick FakeCam as the camera in Zoom, Teams, Meet, Discord or any other app. Your slides, dashboard or app window then appears in your camera tile, even in apps that have no screen sharing at all.
Why put your screen in your camera feed?
Screen sharing sends your desktop as a separate stream that the host controls. Turning your screen into your camera is different, and useful in cases sharing does not cover:
- Apps with no screen sharing. Some webinar tools, interview platforms, chat apps and kiosk-style meeting rooms only have a camera slot. A screen-as-camera puts your content there.
- When sharing is locked. The host disabled screen sharing, or you are not the presenter. Your camera tile is still yours.
- Show one region, not the whole desktop. Draw a rectangle around a chart, a code window or a game and only that area goes out, at full size, with the rest of your screen private.
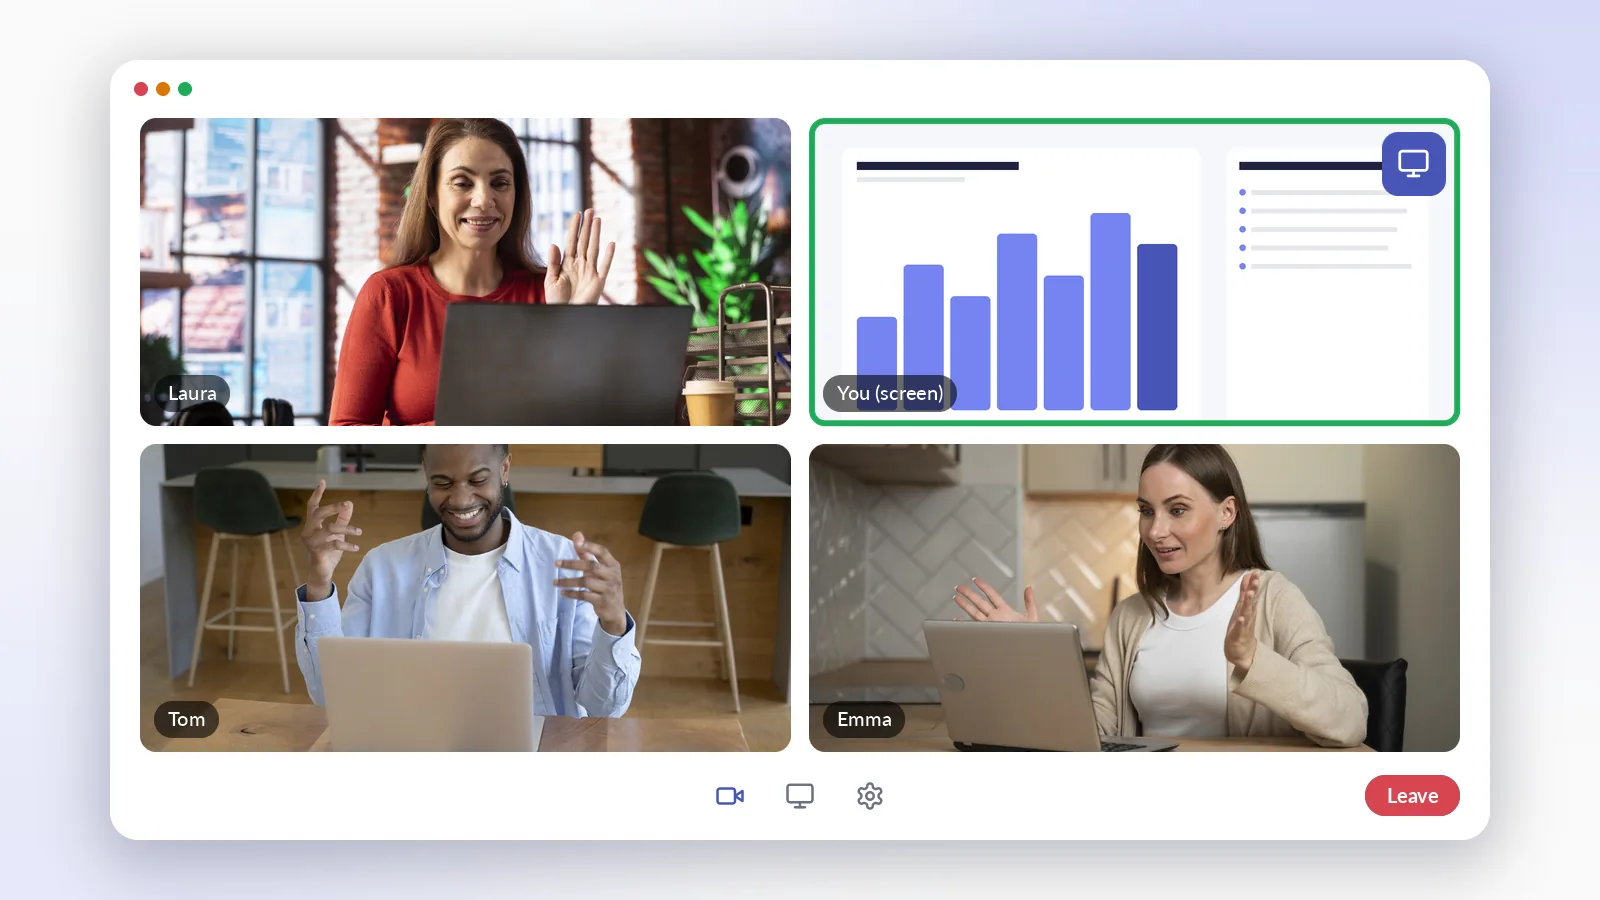
- Camera plus sharing at the same time. Share your slides normally, and let your camera tile show a live demo, a timer, a second app, or a video that loops.
- Testing and demos. Feed a known, repeatable picture into any app that reads a camera.
What you need
- A Windows 10 or 11 PC. No account, no signup.
- FakeCam, free. It registers one virtual camera on first run.
- The thing you want to show open on your screen: a slide deck, a browser tab, a dashboard, a game.
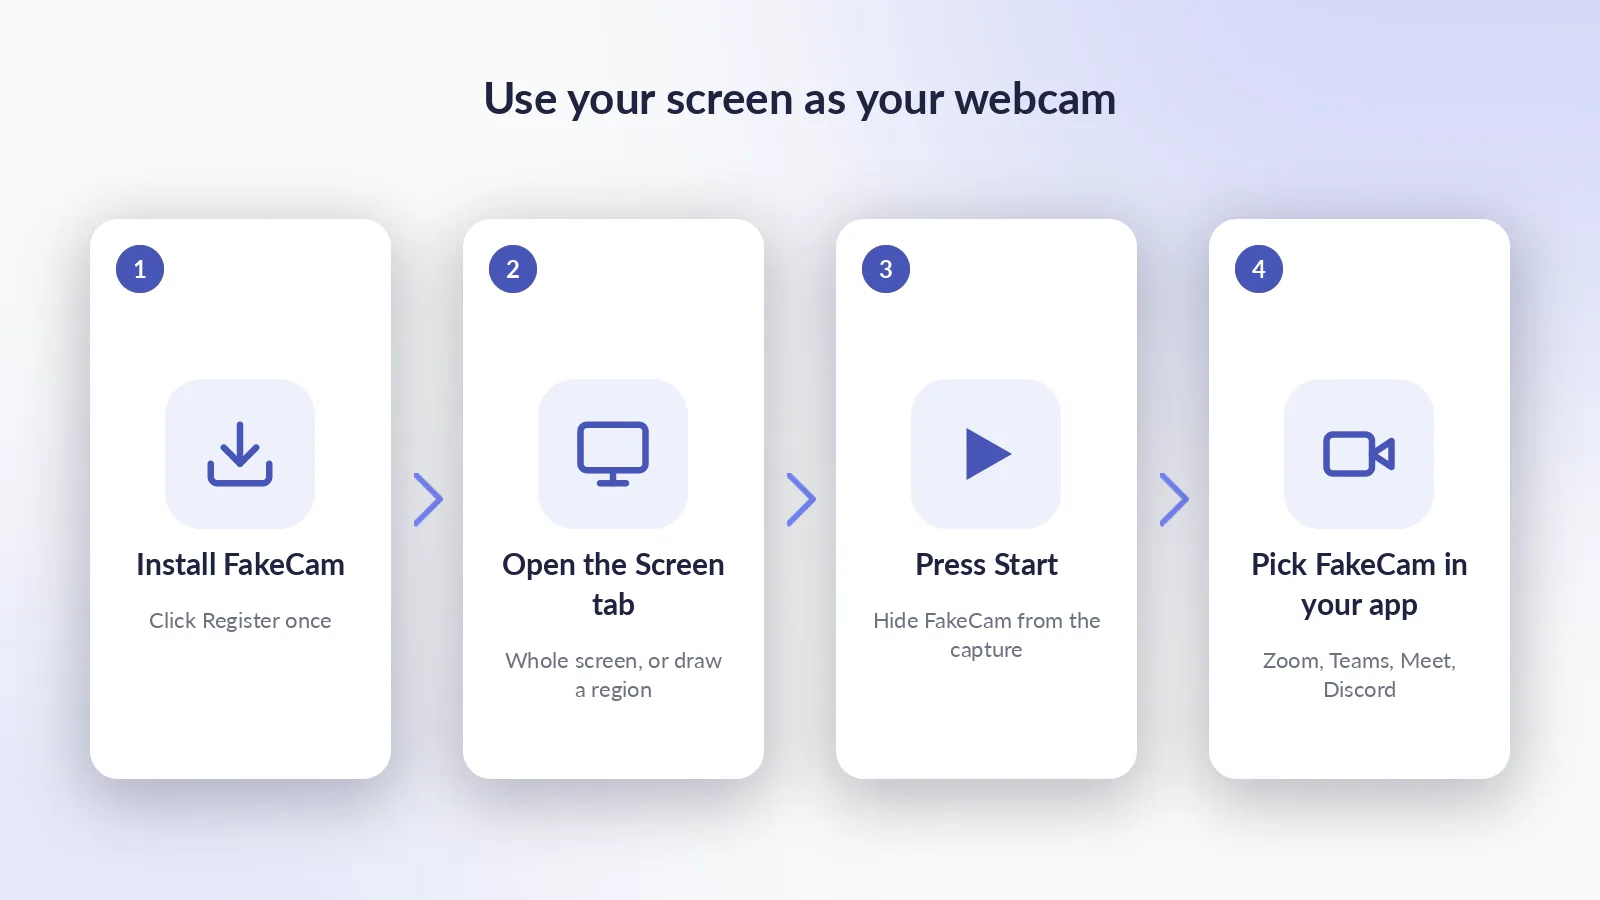
Use your screen as your webcam in 4 steps
- Install FakeCam and click Register once so Windows adds the camera (one administrator prompt, then never again).
- In FakeCam, open the Screen tab. Choose Whole screen, or Select region... and draw a rectangle around the part you want to show.
- Turn on Hide FakeCam from the capture so the FakeCam window itself never appears in your feed, and Hide the taskbar if you want a clean picture. Press Start.
- Open your meeting app and pick FakeCam as the camera. Your screen is now your webcam.
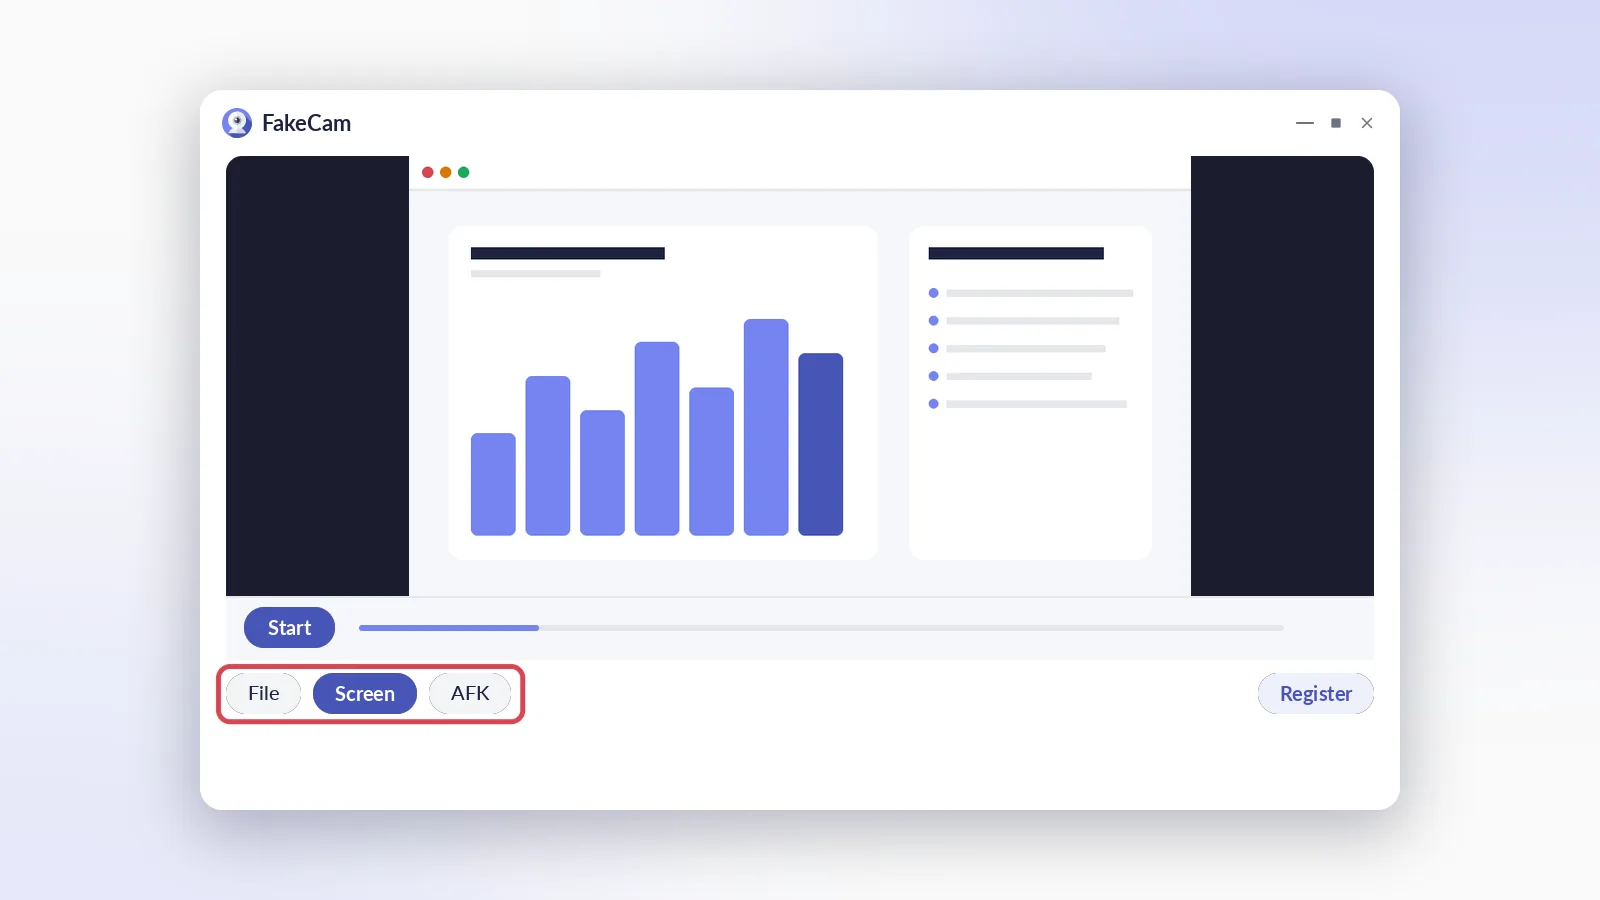
The preview in FakeCam shows exactly what other people receive. Press Stop whenever you want your real camera back.
Whole screen or a region?
| Whole screen | Select region | |
|---|---|---|
| What goes out | Everything on the screen | Only the rectangle you drew |
| Readability | Small text shrinks in a camera tile | A tight region keeps text large |
| Privacy | Notifications and other windows are visible | Nothing outside the rectangle |
| Best for | A full-screen app or slideshow | A chart, a code window, a game, a video player |
For a meeting, a region is usually the better choice: draw it around the window that matters and size it close to a 16:9 shape so it fills the camera tile without black bars.
Tips for a sharp, readable picture
- Set the camera resolution to match. In FakeCam's settings, set the resolution to 1920 x 1080 (or the size of your region). A screen squeezed into 640 x 480 turns text into mush.
- Bigger fonts, fewer windows. A camera tile is small on the other end. Zoom your app to 125 or 150 percent, or draw the region around the part you need.
- Keep the region 16:9. A square region ends up letterboxed in a widescreen tile. If you would rather fill the tile, turn on Stretch to fill in FakeCam.
- Hide what should stay private. Turn on Hide FakeCam from the capture and Hide the taskbar, close chat and email windows, and turn on Windows Do not disturb so no notification pops into the feed.
- Two monitors? FakeCam captures your main display (the one Windows marks as main in Display settings). To show a second monitor, make it the main display for the call, or move the window you want onto the main screen and draw a region around it.
- The mouse pointer is not captured. Move it freely; it never appears in the feed.
- Text reads backwards? Meeting apps often mirror your self-view but not what others see. Ask a colleague, and use FakeCam's Mirror switch only if they confirm the text is reversed.
Screen as webcam vs screen sharing
| Screen as webcam (FakeCam) | Built-in screen sharing | |
|---|---|---|
| Works when sharing is disabled | Yes | No |
| Works in apps with only a camera slot | Yes | No |
| Shows in your own camera tile | Yes | No, a separate stream |
| Can run at the same time as sharing | Yes | Yes |
| Resolution | The camera resolution you set (up to 1080p) | Usually higher, app dependent |
| Best for | Camera slots, locked sharing, one region, testing | Full presentations when the host allows it |
Honest read: when normal screen sharing is available and allowed, it gives more pixels. The camera route wins when sharing is not an option, when you want just one region, or when you need your content in the camera grid alongside everyone's faces.
Which apps does this work in?
Any app that lets you pick a camera: Zoom, Microsoft Teams, Google Meet, Discord, Skype, Webex, Slack huddles, browser-based tools, and OBS as a video capture device. Pick FakeCam where you would pick a webcam. The only exception is the new Microsoft Teams desktop app, which reads cameras differently; there, use Teams in the browser.
If it does not work
- The app does not list FakeCam. Start the capture in FakeCam first, then fully quit and reopen the meeting app: most apps read the camera list only at launch. Confirm the camera is registered (the Register button). For Meet, see camera not found in Google Meet.
- Black picture. FakeCam is not capturing: press Start on the Screen tab.
- The picture froze after locking Windows or an administrator prompt. Press Stop, then Start again.
- You see FakeCam inside the feed. Turn on Hide FakeCam from the capture.
- Others see a tiny picture. Raise the camera resolution in FakeCam's settings and draw a tighter region.
FakeCam captures the screen, not audio: sound from your PC is not sent into the call. Use the app's own audio sharing, or a microphone, for that.